Publishing Design
23/04/2025 - 23/07/2025 | Week 01 - Week 14
Wong Jia Yi Carmen | 0357198 | Section 01
Publishing Design | Bachelor of Design (Hons) In Creative Media
TABLE OF CONTENTS
LECTURES
Chapter 1: Publishing Design (Formats)
The Book
The word "publishing" refers to a broad variety of media, including books, newspapers, and magazines, as you may remember from last semester. But this semester, we'll be focusing on the book format in particular. This decision was made in light of the book's long history, it was the first to be published, as well as its enduring significance. Books have been at the centre of many significant publishing developments. They are effective instruments for documenting and disseminating history, ideas, and knowledge, among other things. Strong typographic skills, an attention to detail, knowledge of spatial layout, and familiarity with publishing software are all necessary when designing a book.
Question: In your view, what factors influence and determine the format of a book?
- Size: Consider the target audience, such as designing smaller books for children.
- Content: The type and amount of content may dictate the book's size and format.
The Book / Historical Formats
Let’s now explore the various publishing formats that emerged throughout history in different civilizations around the world. We’ll examine what made each format unique and consider the potential reasons why some of them eventually declined.
-
Iran-Iraq: Mesopotamian civilization
-
Egypt: Ancient Egyptian civilization
-
India, Pakistan, and Afghanistan: Indus Valley civilization
-
China: Han Chinese civilization
-
Europe (including Turkey and surrounding areas): European civilization
Innovation often follows closely behind advancements in technology. When new technologies emerge, they open up new possibilities. If a technology is powerful enough, it can create ripple effects that influence many other aspects of life.

We will start with the earliest civilization Mesopotamia.
For Mesopotamia Denise Schmandt-Besserat (1995) contends in her essay on the token system "Record Keeping Before Writing," that "It is remarkable that the first writing system developed from a counting technology."
The progression from simple and complex tokens to bullae set the stage for the early forms of pictographic writing on clay tablets.

Indus Valley River Civilization
In the Indus River Valley Civilizations, such as Harappa and Mohenjo-daro, not much is definitively known about their methods of record keeping, but evidence suggests they had a sophisticated system. Their script, known as cuneiform, was among the earliest forms of writing. It was used to document aspects of governance, religious practices, and trade. This writing was typically inscribed onto soft clay tablets using pointed tools.

The oldest known palm leaf manuscript still in existence comes from Nepal and dates back to around 800–900 CE. However, palm leaf manuscripts may have been in use as early as 1000 BCE in the Indus Valley. This writing medium was widely used throughout South Asia.


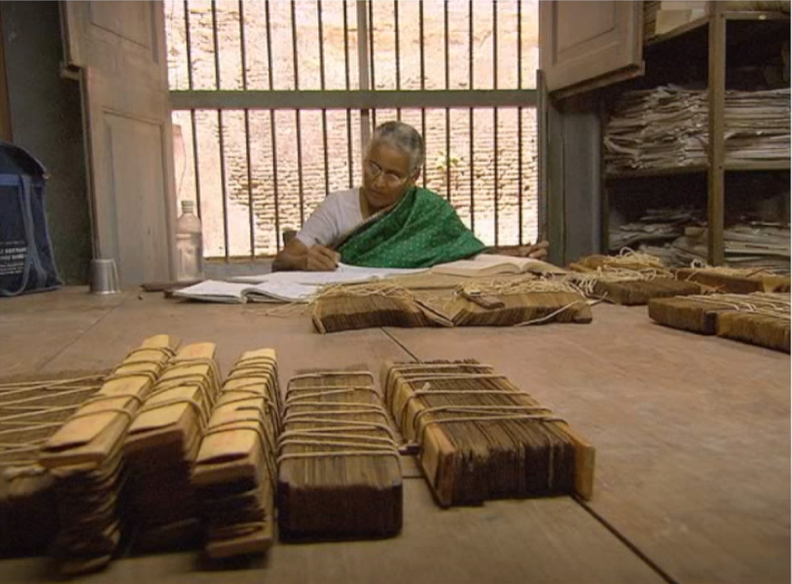
Palm Leaf Manuscripts. One of the oldest surviving palm leaf surviving palm leaf manuscripts is a Sanskrit Shavism text from the 9th century, discovered in Nepal, now presented at the Cambridge University Library.

Egypt
In ancient Egypt, scribes were the only individuals trained to read and write in hieroglyphics. They primarily wrote on a unique type of paper known as papyrus, but they also inscribed texts on the walls of tombs.
Papyrus refers to a thick paper-like material made from the pith of the papyrus plant (Cyperus papyrus).

1600 BCE. It is written right to left in hieratic, the Egyptian cursive form of hieroglyphs. In black ink with explanatory glosses in red ink. The vast majority of the papyrus is concerned with trauma and surgery.

Han China
In ancient China, characters were traditionally written in vertical columns, making narrow bamboo strips well-suited for single columns of text. To form longer documents, each strip was connected to the next using two threads. Interestingly, the modern Chinese character for 'book' is derived from a pictogram representing these threaded bamboo strips.
In 105 CE, a court eunuch named Cai Lun presented a report introducing a new writing material.

The first printed book: Diamond Sutra 868 CE
The earliest known printed book is Chinese, from the end of the T'ang dynasty. Discovered in a cave at Dunhuang in 1899, it is a precisely dated document. Using paper, it is in a scroll format. Paper was invented as mentioned earlier in 179-41 BCE

Chinese publishing: 10th - 11th century
Printing from wood blocks, as in the Diamond Sutra, is a laborious process, Yet the Chinese printers work wonders. In the 10th and 11th centuries, all the Confucian classics are published for the use of scholar officials, together with huge numbers of Buddhist and Daoist works (amounting to around 5000 scrolls of each) and the complete Standard Histories since the time of Sima Qian.
The carving of so many characters in reverse on wood blocks is an enormous investment of labour, but the task is unavoidable until the introduction of movable type. This innovation, once again, seems to have been pioneered in China but achieved in Korea.

Parchment, made from animal hide, was first developed in Turkey between 197 and 159 BCE and eventually spread to Europe. Unlike papyrus and bamboo, which were suitable for scrolls, parchment was too thick and heavy for that format. By around 50 AD, Europeans began using parchment to create books instead.

197-159 The two leaves of parchment, filled with "surprisingly legible" text from Islam's holy book, have been carbon dated to close to the time of the Prophet Mohammed.

From China, paper slowly traveled westward, first through the Arab and Persian
empires, then through the Ottoman Empire in Turkey, and finally to mainland
Europe.
Paper wasn't widely available in Europe until the years 1400–1500 CE.
Until the 1860s, when wood pulp was first used—most notably for printing the
Boston Weekly Journal—the materials used to make paper changed over time.

The folding format began to gain traction in the west at the turn of the century, whereas paper arrived relatively late. First with wooden blocks held together by thread, then with parchment, and finally with paper, which was bound and adhered together.

Chapter 2: Publishing Design (History Of Prints)
2nd - 8th century AD
The emperor of China commanded, in AD 175, that the six main classics of Confucianism be carved in stone.
Confucian scholars eager to own these important texts simply lay sheets of paper on the engraved siabs and rub all over them with charcoal or graphite, taking away a text in white letters on black ground.


Korea and Japan: AD 750 - 768
The invention of printing is a striking achievement of Buddhists in East Asia. Korea takes the lead. The world's earliest known printed document is a sutra printed on a single sheet of paper in Korea in AD 750

Japan conducted an impressive mass production experiment in AD 768. An
enormous quantity of printed prayer charms, or talismans, were produced at the
empress's order in the deeply Buddhist city of Nara. The project reportedly
took six years to complete, and approximately one million copies were made to
be given to pilgrims. Many of these prints are still in existence today.

One of the first known examples of woodblock printing in Japan is the Hyakumanto Darani, which translates to "One Million Pagodas and Dharani Prayers." Empress Shōtoku ordered the construction of one million tiny wooden pagodas in 764. Each one had a small printed scroll with Buddhist text on it, measuring about 6 by 45 cm. As a token of appreciation for the Emi Rebellion's successful suppression that year, these were given to temples all over Japan. Several of the original pieces from this project, which is the first known instance of woodblock printing in Japan, are still in existence today.

The first printed book: AD 868
The earliest known printed book is Chinese, from the end of the T'ang dynasty. Discovered in a cave at Dunhuang in 1899, it is a precisely dated document which brings the circumstances of its creation vividly to life.
The scroll, which was created by joining sheets of paper along their edges, is 16 feet long and 1 foot high. Its first sheet is particularly significant because it has the earliest known printed illustration of the Buddha sitting on a throne and surrounded by holy attendants. It also contains the text of the Diamond Sutra.


The scroll, which was created by joining sheets of paper along their edges, is 16 feet long and 1 foot high. Its first sheet is particularly significant because it has the earliest known printed illustration of the Buddha sitting on a throne and surrounded by holy attendants. It also contains the text of the Diamond Sutra.
Chinese Publishing: 10th - 11th Century
The Diamond Sutra was printed using a laborious and time-consuming process
called woodblock printing. In spite of this, Chinese printers achieved
amazing achievements. They created editions of all the Confucian classics
for scholar-officials in the tenth and eleventh centuries, as well as the
full Standard Histories from Sima Qian's time and enormous amounts of
Buddhist and Daoist texts (roughly 5,000 scrolls of each).
Prior
to the invention of movable type, carving thousands of characters in reverse
onto wooden blocks required a great deal of time and effort. Although China
was also the source of this innovation, Korea was the first to successfully
apply it.
Movable type: From the 11th century
For printing to be a useful and effective way to disseminate information,
movable type, individual, pre-formed characters or letters that can be
arranged to form texts and reused, is necessary.
As early as the
eleventh century, China started experimenting with this concept, but its
success was hampered by two major issues. First, the Chinese writing system
had so many characters that it was very difficult to cast and arrange the
type. Second, the material used to create the characters was too brittle for
frequent use because they were made of clay and fired like pottery.
Type foundry in Korea: c.1380
Korea established a foundry to create movable type out of bronze in the late
14th century, several decades before printing started in Europe. Bronze
proved resilient enough to endure repeated use, enabling printing,
disassembly, and type rearrangement for new texts, in contrast to the
earlier Chinese attempts with delicate pottery.
Koreans were
still using the intricate Chinese writing system at the time, which
presented difficulties because of its many characters. In order to solve
this problem, they developed their own alphabet, known as Han'gul, in 1443.
It is interesting to note that this development took place in Europe, where
the alphabetic system had been in use for more than two millennia, at the
same time that Gutenberg was experimenting with movable type.
Saints and playing cards: AD c.1400
The technique of woodblock printing arrived in Europe around 1400, more than
six hundred years after it was created in the East. It was similar to the
Eastern method in that the image was transferred by rubbing the back of the
paper onto an inked, carved block. Similar to Asia, the main products were
pilgrims' religious images, though playing cards also gained popularity in
the early European print market.
Printing was rapidly transformed
from a small-scale craft into a fundamental force in forming Western
civilisation by the late 15th century, thanks to developments in Germany.
Left: Chinese playing card found near Turfan, fifteenth century.
Right: Queen of Wild Men, ca. 1440, engraving by the Master of the Playing Cards, with whom Gutenberg is thought to have worked (Kupferstichkabinett, Dresden).

Gutenberg & Western Printing: AD 1439 - 1457
When two business partners sued Gutenberg in Strasbourg in
1439, his name was first associated with printing. Although no tangible
proof from this period has survived, witnesses claimed to have seen a press
and metal type among his possessions, indicating he was already creating
small printed texts using movable type.
Gutenberg was in Mainz
when he was next mentioned in relation to printing. He used his printing
equipment as collateral to borrow 800 guilders from Johann Fust in 1450. A
noteworthy and dramatic period in printing history was the period between
Gutenberg and Fust.

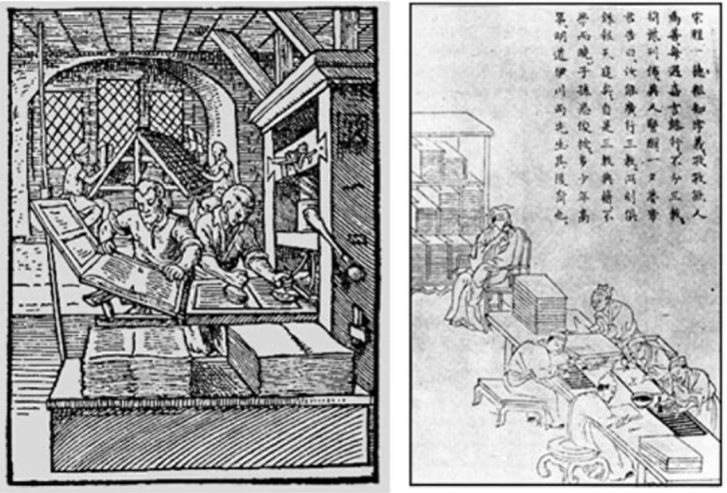
A number of significant inventions were part of Gutenberg's significant
contribution to printing history. One was the development of a printing
press that could exert steady, firm downward pressure more quickly, though
the concept of a press was not wholly novel.
But more important
were Gutenberg's metallurgical abilities, which he developed from his
experience as a goldsmith. These allowed him to handle the complex process
of creating movable type, which included creating a master copy of every
letter, creating molds to cast several copies, and creating type metal, a
robust alloy.
All of this sophisticated technology comes before the fundamental task of printing, which is aligning and spacing the individual letters in a way that will hold them firmly and level so that the ink transfers evenly to the paper.
No date appears in the Gutenberg Bible (known technically as the 42-line Bible), which was printed simultaneously on 6 presses during the mid-1450s. But at least one copy is known to have been completed, with its initial letters coloured red by hand, by 24 August 1456. The first dated book from these same presses. In 1457, it is even more impressive. Known as the Mainz Psalter, it achieved outstanding colour printing in its two-colour initial letters.

The rest is History!
Many Inventions to improve on the printing press and its quality were invented on modified over the years.
The industrial revolution brought in precision engineering, and the printing press was one that benefited tremendously.
Where is the world's largest book located?
The World's Largest Book
Every stone tablet is kept beneath a tiny stupa, which resembles a cave and has a roof and a valuable gem on top. These stupas, which are grouped in a circle around a central golden pagoda, number 729 in total.

Conclusion,
Since transfer was first accomplished by rubbing (stone to paper), mass production was made possible. Around 750–768 AD, wood block printing—text carved into wooden blocks—took place in Korea and Japan, producing the first printed document. These were significant accomplishments during the Buddhist period.
In the years 1000–1100 CE, movable type was invented. Although this invention originated in China, Korea was the first to implement it (Diamond Sutra). The Koreans set up a foundry to cast movable type in bronze in the late 1300s–1399 CE, decades before the first printing in Europe (Gutenberg's bible, 1439).
Chapter 2: Publishing Design (Typo Redux)
Typography
The fundamental worth of typography equals the lifesaving requirement of oxygen. The skill of typography stands as the most important capability in graphic design since it enables professionals to achieve excellent work standards.
The fundamental aspect behind typography consists of purposeful text arrangement together with its typestyles. It functions as both a creative, expressive mechanism and primarily as a total communication instrument. All visual design projects require typography as their essential element.
Your obtained knowledge related to typography, together with increased sensitivity from two semesters, will prove essential for creating successful book designs. We will first review the necessary core typography principles.
Characters in a typeface
- Small Caps
- Numerals
- Fractions
- Ligatures
- Punctuations
- Mathematical Signs
- Symbols
- Non-aligned figures

X-height: The height of lowercase letters. which is important for understanding the proportions of typefaces.


Choosing open and classical serif typefaces enhances legibility for large bodies of text.

Legibility
Text readability enhancement requires strict adherence to established legibility principles when typography is the main focus. The designer should break these guidelines after mastering their principles and ensuring the message requires expressive visuals.
Improving legibility begins with choosing typefaces that maintain an open structure and balanced appearance, among which Garamond and Bodoni, Bembo, Minion Pro, Baskerville, Jenson, and Caslon are classic serifs, and Franklin Gothic, Frutiger, Gill Sans, Helvetica, Myriad Pro, and others are sans serifs.


Special Style
The extensive features of computers today allow users to create complex text formats which were previously known as typesetting. The widespread availability of computers has created typographic misuse because users frequently disregard typographic rules although they lack understanding of these principles thus making text difficult to read for the audience.
The improper application of underlines remains a critical issue that affects legibility according to many software tools (refer to fig. 3.8). An optimal placement of underlines should be below the text level since text contact reduces readability. Two basic underlining methods exist for sentences or word selection.
The cat jumped over the lazy dog.
The cat jumped over the lazy dog.
Proper typesetting is crucial for readability; avoid underlining that touches text as it disrupts pattern recognition.
Small caps alongside all caps present suitable options for subheadings while also functioning effectively in the first line of a paragraph. Short headlines and subheadings work best when written in all caps format. Long texts and emphasis creation should avoid using these formats because it leads to reduced readability.
Avoid using all capitals for long texts as it disrupts reading rhythm and
comprehension.

Special-Purpose Style: The majority of software applications contain predefined formatting styles that enable users to create footnotes and references and insert mathematical equations. The tools exist in advanced sections of the software interface, which casual users may overlook because they do not recognise their purpose.
Use superscripts and subscripts correctly for citations and mathematical expressions.

Text Scaling: Software programs enable users to modify fonts through adjustments of width and height parameters for artificial compression or extension. When users modify the typeface dimensions, it causes damage to the original design structure of the typeface which reduces its visual quality. The artificial modification of font size creates two problems: it reduces legibility and it produces an unprofessional appearance that should be avoided.
Do not distort fonts by squeezing or stretching them, as this alters their design and readability.


Outline & Shadow: Another style that tends to be abused a lot is the outline or shadow style. This happens when deluded individuals, through a flick of a mouse and the aid of software, think they can do magical things. It takes many years of practice and many more years of experience before one can format text beautifully and effectively. Please avoid outline and shadow as far as possible.
Proper text flow is essential for legibility and readability. Issues arise when type size, line length, and line spacing are not harmoniously balanced

Type Size, Line Length & Line Spacing
Reading flow becomes natural when type dimensions, line length and vertical space (leading) maintain equal balance. Poor adjustment of any element in these typographic components makes even the most well-designed fonts unreadable.
The optimal number of characters in a text column should range between 50 to 65 characters per line. Readers tend to avoid text that is difficult to read because of small type size which leads to excessive character density on each line.
Font size determines line length that affects the correct selection of line spacing. The recommended text readability is achieved when each line contains 50 characters.
A text column should normally contain between 50 to 65 characters for each line. Text becomes difficult to read when type size reduces the number of characters per line below an acceptable level. Text that appears difficult to read will likely not be read by anyone.
Leading, or line spacing, refers to the amount of space between lines of type. As with type size, there are no set rules for how much line spacing to use, however, there are some major factors to consider:
- The font used: some fonts require more line spacing than others to keep their ascenders and descenders from touching.
- The line length: longer lines require more leading for easier reading.
- The type size: the larger the type size, the more line spacing is required. This rule mostly refers to body copy, headlines, which are normally set larger, may actually be set with tighter line spacing.

Overly long or short lines of type also tire the reader and destroy a pleasant reading rhythm


Character & Word Space
The combination of entering text with font adjustments and size and line spacing modifications provides adequate formatting clarity. The specific software program determines whether further adjustments are needed or not. The process of enlarging text requires specific spacing modifications for characters alongside potential adjustments to paragraph formatting to prevent visual problems like widows and orphans.
A widow is a single word at the end of a paragraph, while an orphan is a single word at the beginning of a new column. Both should be avoided as they disrupt the flow of text .
The spacing between characters known as kerning serves as a crucial element for developing text that looks both attractive and easy to read. The majority of word processors lack manual kerning control but professional page-layout software automatically applies kerning. Some pairs of letters require manual adjustments to reach an aesthetically pleasing balance.
Adjusting the space between characters (kerning) and overall letter spacing (tracking) is important for readability, especially in headlines. Proper spacing can prevent visual clutter.

Word spacing, factors that determine correct word spacing include the typeface which is chosen, then the size and weight of the type.
Consistent word spacing provides an even typographic "colour", a term referring to the overall lightness and darkness of the text.

Italics:
Italics and oblique type should be used with presence, for large amounts of slanted characters set into text impede reading. Italics are best suited to create emphasis within text rather than to function as text.
Capitals:
TEXT SET IN CAPITAL NOT ONLY CONSUMERS MORE SPACE THAN TEXT SET IN LOWERCASE, IT SEVERLY RETARDS THE READING PROGRESS. LOWER-CASE LETTERS IMBUE TEXT WITH VISUAL CUES CREATED BY AN ABUNDANCE OF LETTERS' SHAPES. ASCENDERS, DESCENDERS AND IRREGULAR WORD SHAPES. TEXT SET IN ALL CAPITALS IS VOID OF THESE CUES, FOR IT LACKS THIS VISUAL VARIETY.
Legibility / Alignment
Text can be aligned in 5 different ways:
- Flush left, Ragged right:
- Flush Right, Ragged Left
- Centered
- Justified (left, centre & right)
Flush left, ragged right produces very even letter and word spacing, and because lines of type terminate at different points, the reader is able to easily locate each new line. This is perhaps the most legible means of aligning text.
Flush right, ragged left alignments worked against the reader by making it difficult to find each new line. This method is suitable for small amounts or text, but is not recommended for large amounts.
Centered alignments give the text a very formal appearance and are fine when used minimally. But setting large amounts of text in this way should be avoided.
Justified text can be very readable is the designer ensures spacing between words are consistent, and that awkward gaps "rivers" do not interrupt the flow of the text.
Paragraph spacing
The automatic space between paragraphs appears during the start of each new paragraph is known as Paragraph Spacing. The designed spacing configuration can be used either above or below a paragraph based on design requirements. The automatic use of paragraph spacing delivers better paragraph separation than manual insertion of double line breaks because it produces uniform and professional results.
Instead of using double spacing, paragraph spacing should be set to match the leading for a cleaner look. This can be adjusted in design software like InDesign.

Paragraph Indent
The most common indent is the small indent at the beginning of each paragraph, but indents have many more uses, including adding an element of design to the page.
First-line paragraph indents should only be used if there is no paragraph space because the indents and the paragraph space exist to inform the reader when a paragraph stops and a new one begins. Using both the indent and paragraph space is overkill.
The standard amount of indent is equal to the type size. For example, if the type size is 12 points, the indent should be 12 points. (Most programs allow the user to enter sizes in points if typed as "p12" or "12 pt"). The amount of the first-line indent can be extended for design purposes.
Indentation should generally match the point size of the text. For example, if the text is 10 points, the indentation should also be 10 points.
Normally, a widow is a single line of text at the top of a page or column, separented from its paragraph, and an orphan is a single line of text at the bottom of a page or column, separated from its paragraph.

Special Formatting
Hyphens function to split words or numbers, yet they also help distribute words between lines in text sections. Using hyphens in headlines or subheadings should be avoided because it reduces readability while diminishing the visual effect.

Dashes come in two varieties: the en-dash and the em-dash. En-dashes are slightly longer than hyphens (usually, the width of the letter "N") and are used to separate ranges of items, such as dates, quantities, and times. As a rule, if you can substitute the word "to" or "through"
The em-dash is used in place of a comma to set off a section of the sentence that requires special emphasis. However, it does have other uses, such as preceding the attribution of a quote, Typically, em-dashes are the width of the letter "M"
To improve readability headlines and subheadings should be divided into multiple lines. Pressing "return" to break a line may introduce unintended paragraph formatting because it will interpret this action as starting a new paragraph.
Most software includes a line break function that users can activate through Shift + Return instead of using the standard return. Line breaks inserted through the Shift + Return function preserve the original paragraph formatting.

Reports benefit from drop caps which are enlarged initial letters placed at chapter beginnings or section starts for visual enhancement. Users can personalize their drop caps through Character styles to modify the font type and style and color.
Several design applications include built-in drop cap settings for users. The absence of drop cap support in software programs should lead designers to refrain from manual creation because inconsistent visual elements will harm layout quality and reading clarity.

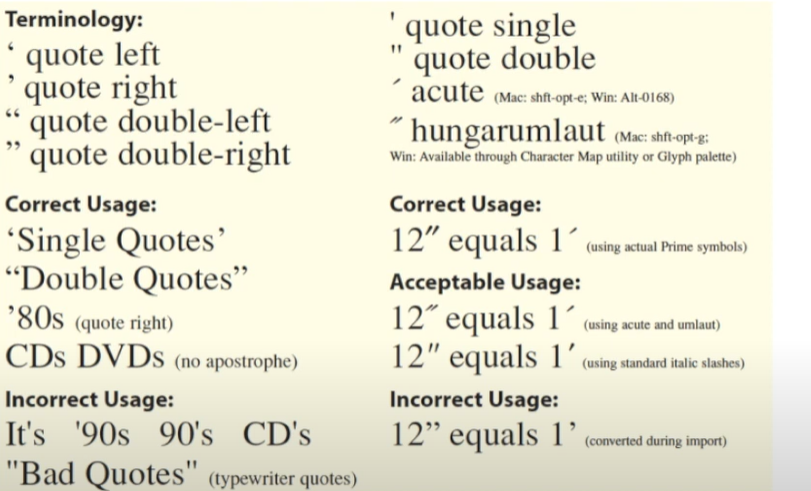
The use of "desktop" quotes which are straight quotation marks represents a clear sign of amateur typography because they originated from typewriter-era fonts. Proper quotation marks provide superior typographic refinement compared to these basic marks. The majority of contemporary applications feature built-in functions which transform straight quotation marks into typographic quotes.
Single and double quotes represent the two main types of quotation marks with two versions for both opening and closing the framed text.
A sidebar is the text that accompanies the main body copy. It is usually an added description that has some relation to the main narrative but isnt't important enough to be part of it. It is sometimes used to highlight alternate narratives or facts or to describe an image used alongside the main body text in line with the sidebar. It is a good practice to maintain a leading that is similar to the main body text despite the smaller font size.

Character Style refers to the formatting controls that are specific to the character/font: Point Size, Leading, Kerning, Tracking, etc.
Paragraph Style refers to the formatting controls that control the formatting of an entire paragraph, alignment, indentation, paragraph spacing, paragraph rules, etc.

Chapter 4: Publishing Design (The Grid)
Introduction to Grids in Design
Grids are a fundamental aspect of design, particularly in typography and layout. They serve as a practical system for organising content on a page, allowing designers to create coherent and functional arrangements. While grids are emphasised as a primary method, other systems can also be utilised in conjunction with them. The effectiveness of a grid lies in its ability to divide a two-dimensional plane into smaller, manageable sections, which can vary in size. This modular nature of grids facilitates the systematic arrangement of text, images and other design elements, enhancing clarity and intelligibility in the final product.
Raster Systeme
The modern design world exists because of individuals such as El Lissitzky, Jan Tschichold, Paul Renner, Moholy-Nagy, Josef Müller-Brockmann and numerous other pioneers. The individuals documented their concepts and experimental results while sharing their findings with others who further used these ideas or made refinements before transferring them to others.
"The use of grid as a wondering system is the expression of a certain mental attitude inasmuch as it shows that the designer conceives his work in terms that are constructive... This is the expression of a professional ethos: the designer's work should have clearly intelligible, objective, functional and aesthetic quality of mathematical thinking." (Brockmann, 2010)
The choice to use grids reflects a designer's mental attitude and professional ethos. A grid system embodies a belief in orderliness and functionality, promoting a design that is both aesthetically pleasing and easy to navigate. This approach is rooted in the principles of rationalism, which were prominent during the modernist movement in design.
The grid divides a two-dimensional plane into smaller fields or a three-dimensional space into smaller compartments. The fields of compartments may be the same or different in size.
Margins and Gutters: The margin areas surrounding the grid are crucial for the overall aesthetic and functionality of the design. Gutters, or the spaces between columns, help in organizing content effectively.
Text Fields and Hang Lines: Text fields are the designated areas where content is placed, while hang lines serve as reference points for aligning text and headings within the grid.

Purpose of The Grid
Grids function as essential tools for typographers and graphic designers and photographers and exhibition designers who need them to solve visual problems in two dimensions and three dimensions. Designers use grid structures to create functional layouts which enable proper organization of text images and diagrams.
The application of this methodology generates well-planned designs that exhibit clarity and visual order. The combination of well-structured titles with subtitles and body text alongside images and captions creates information that people can read quickly while understanding and remembering better. Research demonstrates that designers should maintain this principle as an essential design practice.
Utilising a grid system enhances the readability and retention of information. A well-structured layout allows readers to quickly identify different types of content, such as titles, subtitles and body text, leading to a more engaging reading experience. This systematic approach not only aids in comprehension but also ensures that the design remains visually appealing.


Modular
The Grid operates through modular elements which should not be seen as restrictive or confining structures, or worse, as an inescapable prison. The Grid enables flexibility when users understand its multiple available design combinations. Using the Grid structure in a book needs controlled vibrations to preserve both narrative flow and conceptual coherence.
The success of your design project depends on the specific content found in your book. A book's content spans from basic body text paired with visuals through to combinations of text, visual elements and charts and diagrams and sub-text components. A grid enables designers to organize information into an easy-to-read and understand structure.
While grids provide a structured framework, they do not restrict creativity. Designers can explore various combinations and layouts within the grid system, allowing for innovative designs that still adhere to the principles of clarity and order. The key is to maintain a balance between consistency and variation to avoid confusion for the reader.
Readability and Legibility
Designers primarily serve users who interact with their work. We meet customer needs while simultaneously fulfilling their goals through our work although clients may not recognize this pattern at first.
The grid system functions as an essential component to establish user-friendly interfaces. A well-constructed design functions unobtrusively in the background to let content communicate itself clearly and logically with either beauty or grace. The grid operates like an invisible structural element of well-built architecture which remains unnoticed by observers while serving as the vital foundation.
The grid operates similarly to an invisible structural framework in well-designed buildings because users don't usually notice it but it remains vital to the overall structure.
Conclusion
Our current knowledge of design stems from the pioneering work of El Lissitzky alongside Jan Tschichold and Paul Renner and Moholy-Nagy and Josef Müller-Brockmann who exchanged their experimental findings. Your duty involves making a contribution. The logical arrangement of information makes it simpler for people to understand and retain the information. The grid's modular structure makes it an effective system.
Designers must serve the needs of users who engage with their work. A well-designed system functions behind the scenes while its content delivers clear messages through well-organized structures with pleasing aesthetics.
In conclusion, grids are an essential tool in design that facilitates the organization of information in a clear and logical manner. They reflect a designer's values and beliefs bout order and functionality, ultimately enhancing the user experience. As designers become more familiar with grid systems, they can leverage their flexibility to create engaging and effective layouts that communicate information effectively.
Chapter 5: Publishing Design (Elements)
Question: What are the elements that make up a book?
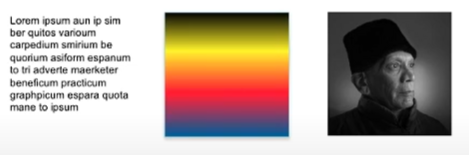
1. Textual Elements: The written content of the book, which is crucial for conveying the message.
2. Visual Elements: Includes images, graphics, and other visual themes that enhance the reader's experience.
3. Colour Elements: The use of color to create mood, emphasis, and variation within the design. Even black and white designs use shades to convey depth.
Book
All publications consists of 3 major elements:
1. Type
2. Colour
3. Image
Holding the above together is the format and grid.
Variation
A grid-based page layout requires careful use of text and color and images to prevent the design from becoming too predictable. Design a layout with diverse elements yet maintain consistent elements across the entire book.
The fundamental design elements of hang line, typeface, color palette and image style must stay consistent for you to test new ways of structuring these components. The understanding of this concept becomes clearer through actual practice instead of theoretical explanations. The "form and movement" exercise emerged from my need to illustrate this concept.
So, how does it work? Does the grid system require text, color and image elements to maintain consistency while allowing variation?
The grid system is a structured layout that helps maintain consistency while allowing for creative variation. It's important to avoid predictability in design.
Balance of Variation and Consistency is a strive for a balance where pages are visually interesting yet cohesive. Too much variation can lead to chaos, while too little can result in monotony.

INSTRUCTIONS
fig 1.0 Publishing Design's MIB (23/4/2025)
Task 1: Exercises
Exercise 1: Mock Up - Book Size
I first started with watching the Exercise 1 tutorial on YouTube that is provided by Ms Vit.

After that, I prepared the materials for me to start doing the exercise.

Then I tape both of the A4 sheets down with cellphane tape to make a A3 size paper.

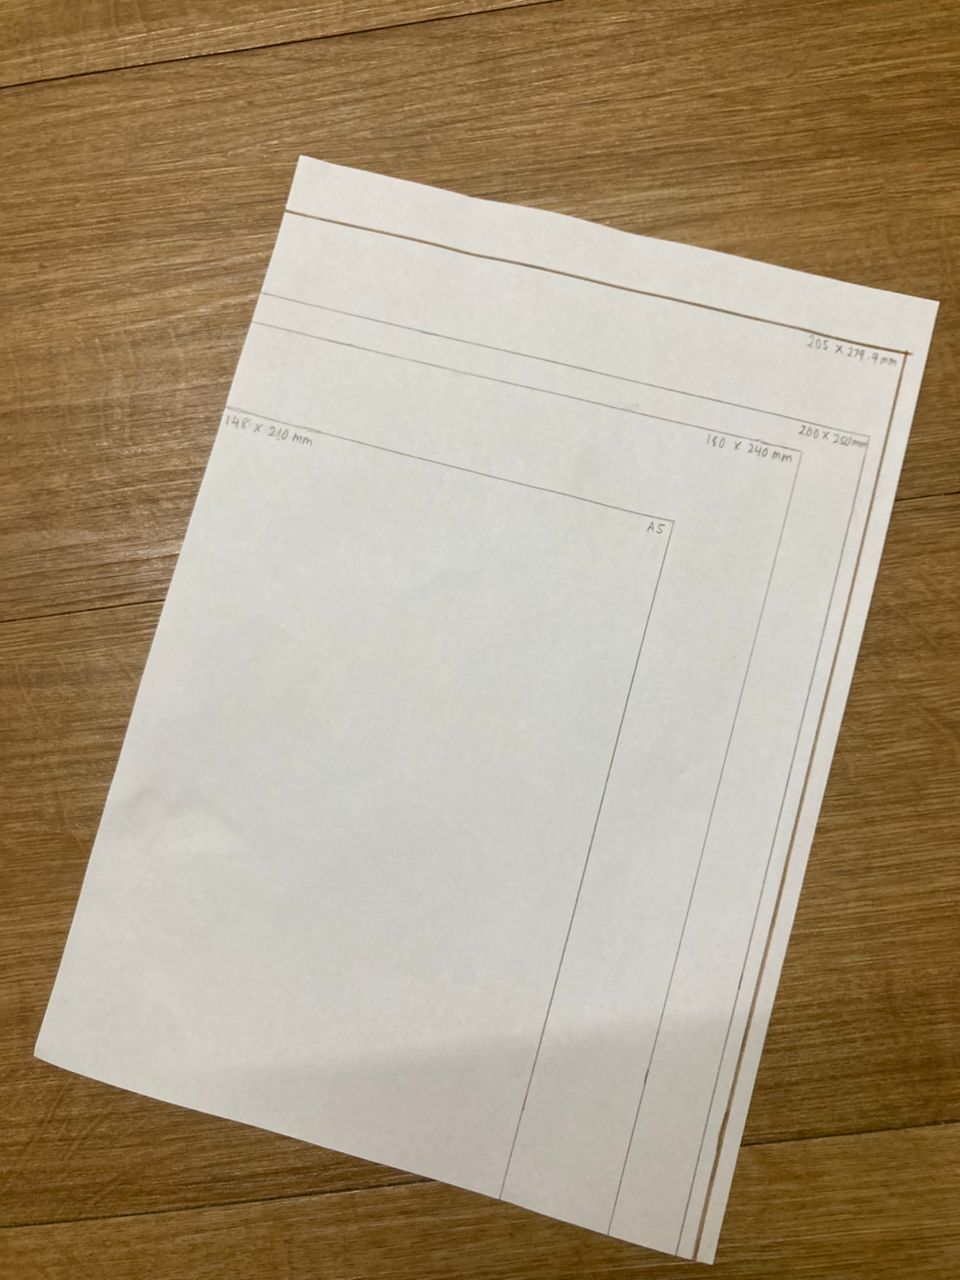
After I fold the paper in half, I measure an A5 size on the paper with a steel ruler and write the measurement size just like the tutorial video.


Here are the rest of the measurements.

After I choose my desired size for my book, I mark it down with a marker pen.
205 mm x 279.4 mm
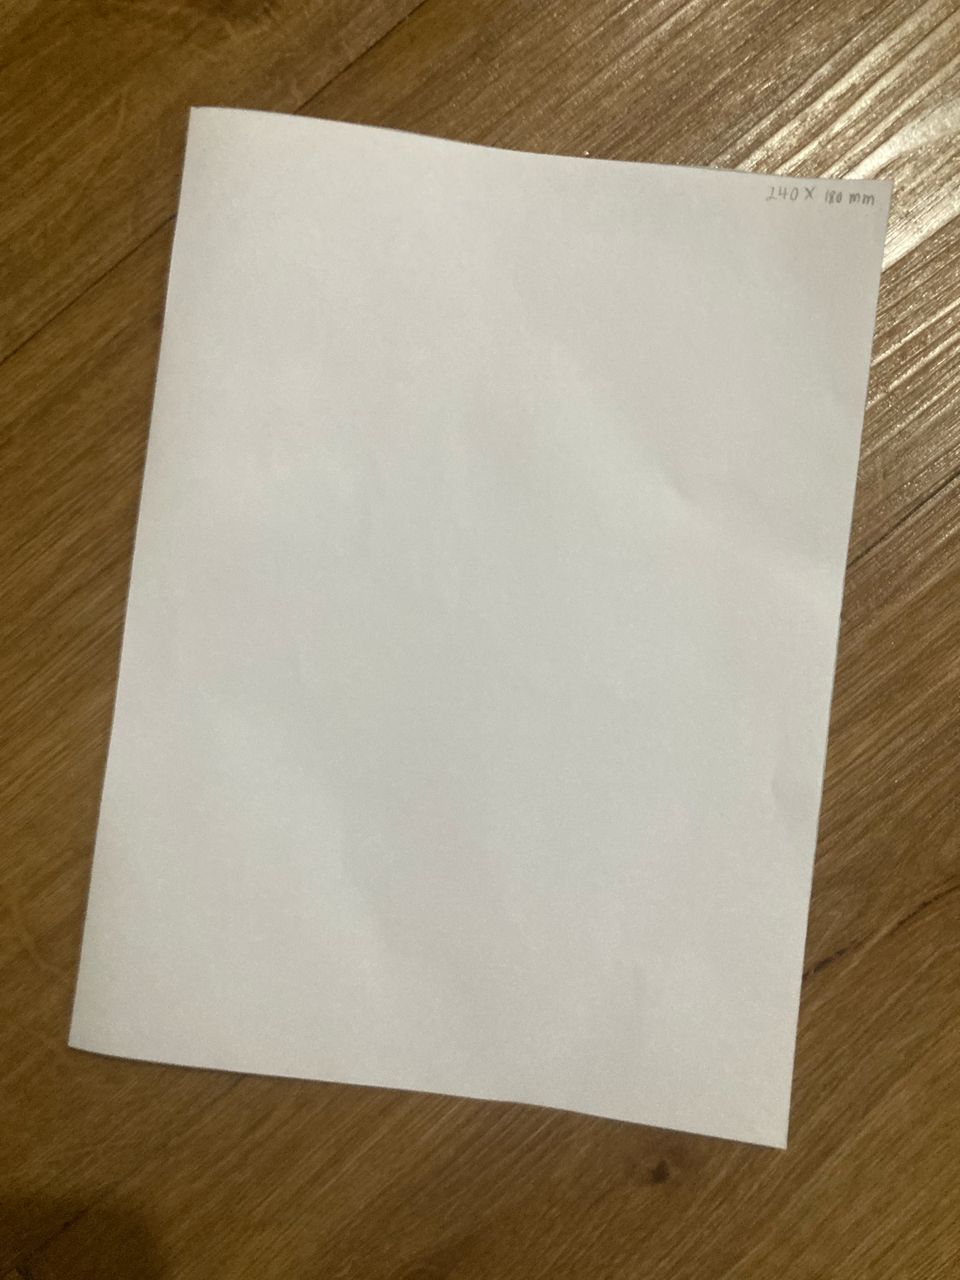
Then I use new sheets of paper, tape them down and cut out the preferred size of my book.


Exercise 2: Signatures
I followed the tutorial on exercise 2, folding the paper.

Here is the results.


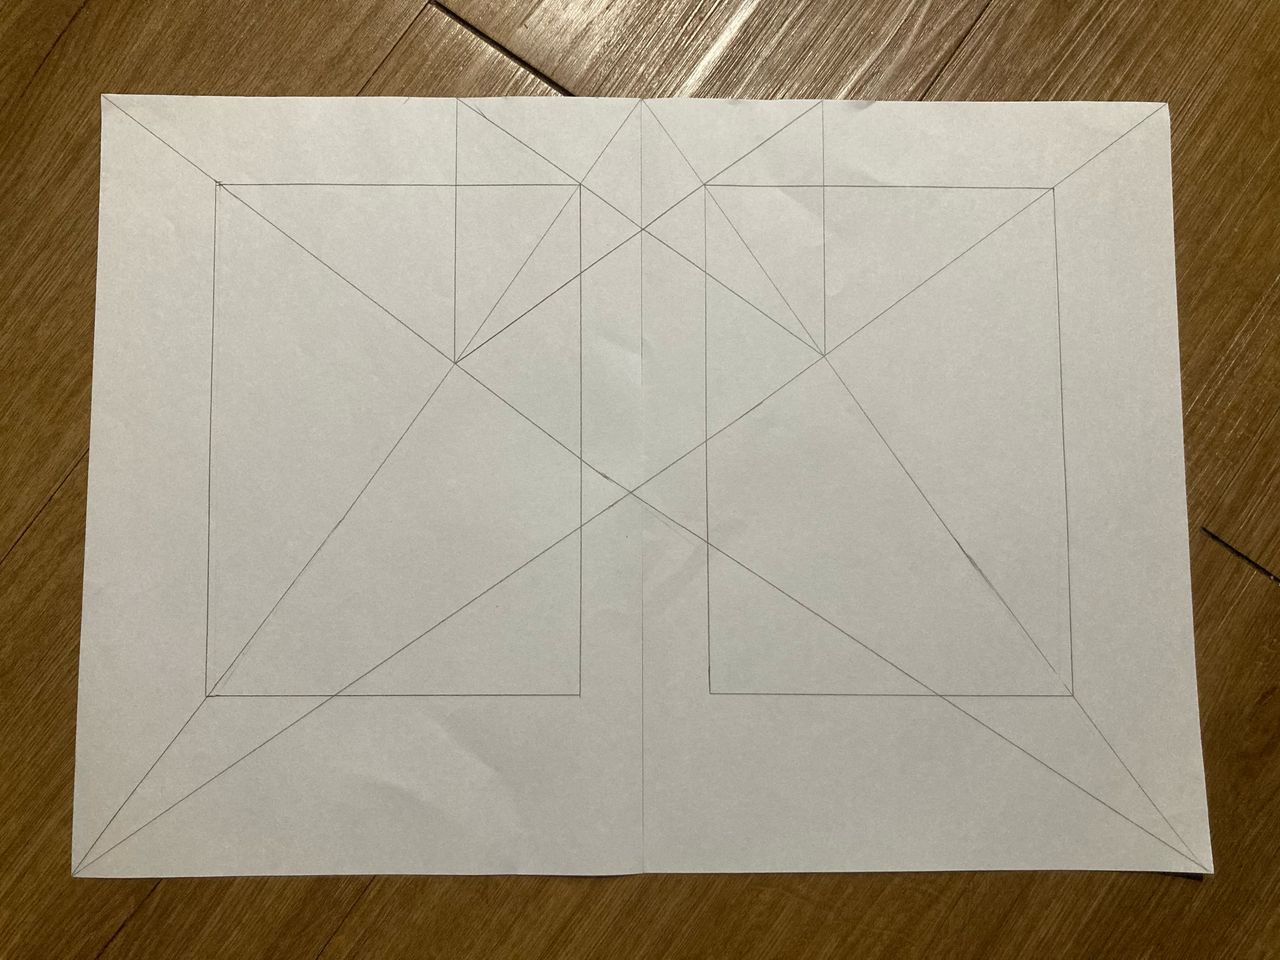
Exercise 3: Van De Graff
First I tape down both A4 sheets of paper.

After tracing down the lines, here is what it looks like.
Exercise 3A: Van De Graff
After watching the tutorial, I got down to business.
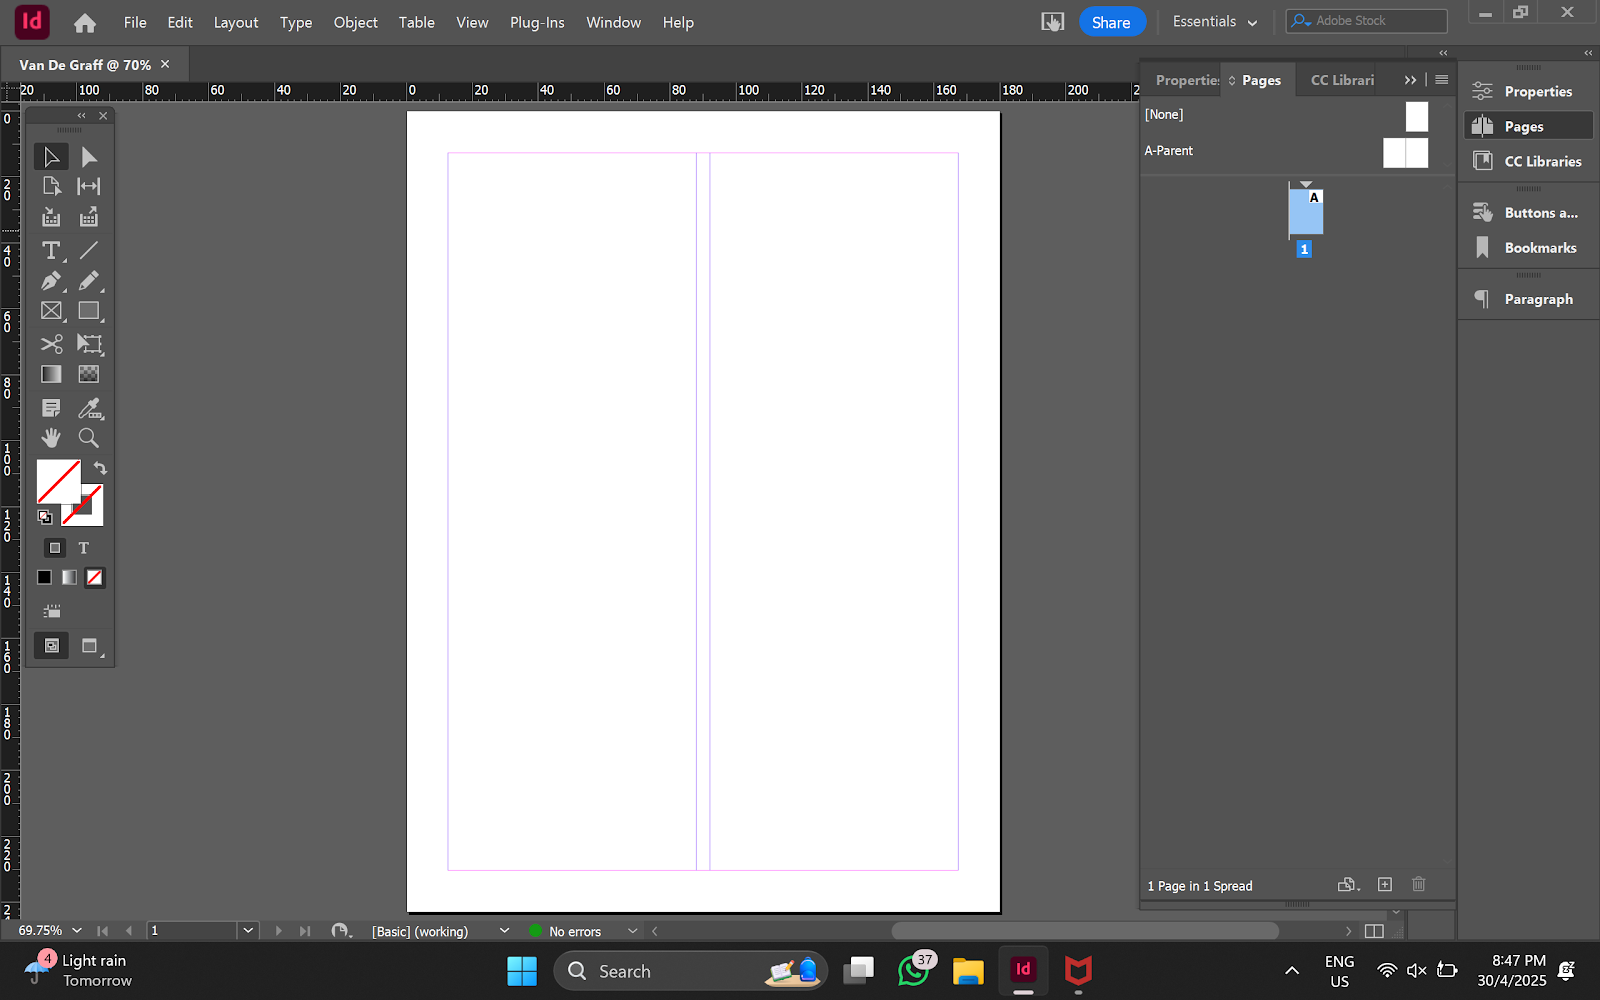
Then I digitise the lines in InDesign.

Here are the finished results.

Exercise 4: Form and Movement
After watching the video from Mr Vinod, I started with my movements.
1 Colour
fig 2.4 1 Colour (21/5/2025)
2 Colours
fig 2.5 2 Colour (21/5/2025)
2 Colours + Image
fig 2.6 2 Colours + Image (21/5/2025)
Colours + Image + Text
fig 2.7 Colours + Image + Text (21/5/2025)
Task 2: Content Generation
1. Content Generation.
fig 1.1 Formatted Content Generation PDF (12/6/2025)
2. Visualization.
Before I start with visualization, I've highlighted some part that I think is suitable. I've decided to use both images and illustration.
fig 1.2 Highlighted Text for Visualization PDF (12/6/2025)
3. Colour Palette.
I decided to stick with one color for my clothes. From top to bottom and on the right, (top, skirt, skin colour, hair, Gugkkie, Reuben, Chanel and Koala).

fig 1.3 Colour Palette (13/6/2025)
For my illustration style, I decided to use a watercolor background to give a soft vibe and I want my storybook vibe to be a children storybook feel.
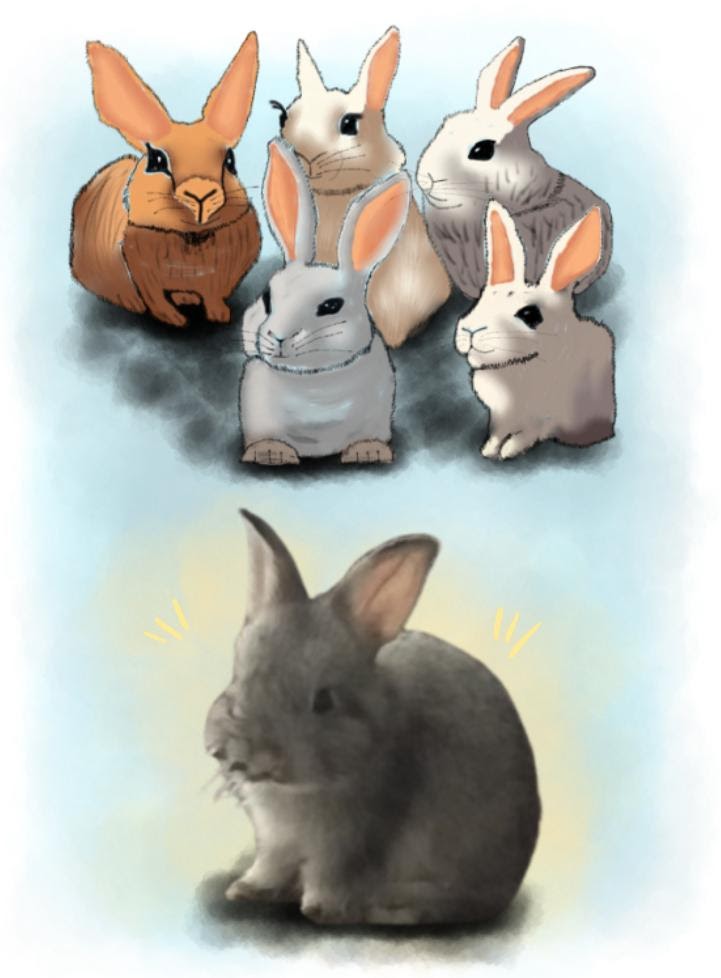
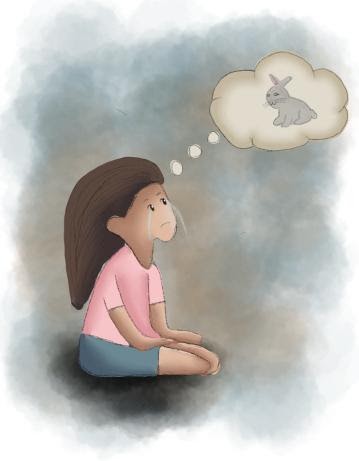
"I always adored fur bunnies as a child."

"Pet Store"
"Distracted by the store's rabbits"
"I pick one which had a soft, light grey fur, named Gugkkie."

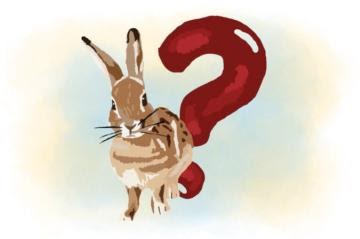
"From Clueless to Curious: Learning The Basics"
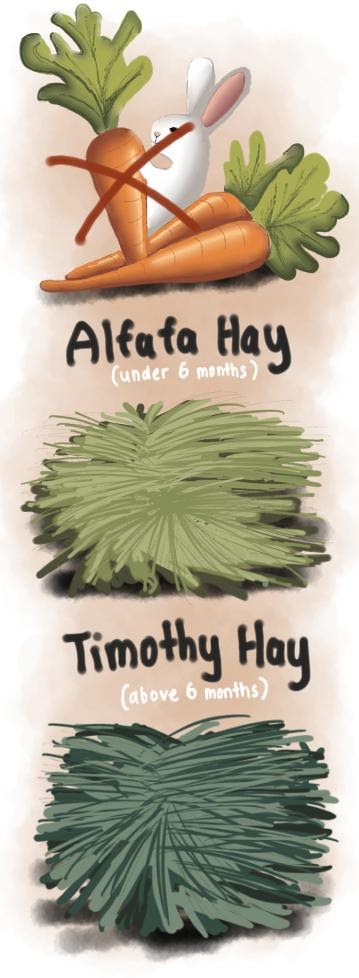
"the popular media's misconception that fur bunnies's diets were carrots, which in fact, due to being high in sugar, can be consumed as a treat."
"For rabbits younger than six months old, Alfalfa hay is an appropriate choice to choose."
"Timothy hay, which is best suited for adult rabbits as it helps in healthy ageing since it less calcium and protein"

"spending my quality time with him."

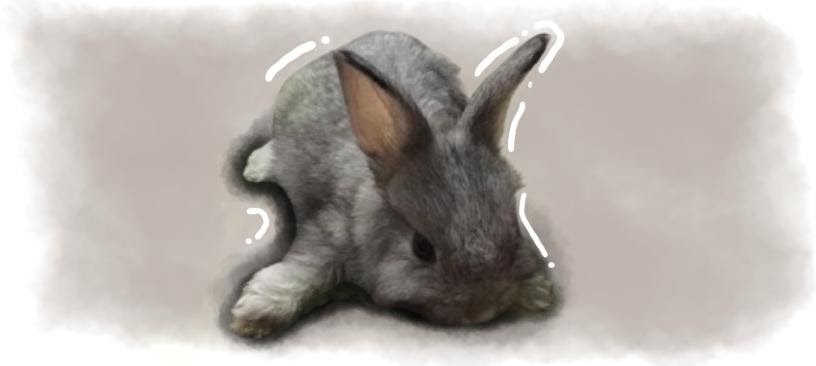
"I was completely in shocked and taken aback and plus, I honestly really had no idea what had just happened to him."

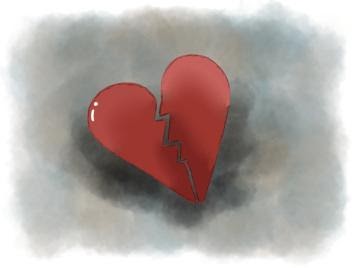
"When the Hops Fell Silent"

"My heart shattered"
"I was reminded that he was no longer there, even though I kept expecting to hear him or see him waiting"
"Grief, Grace and a Box of Hope"

"When Two Bunnies Found Me"


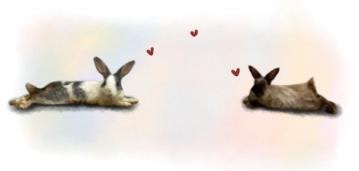
"Two distinctive unique grey patches on his soft back to his tail make him stand out among the rest"

"Her gentle movements conveyed a sort of elegance while her coat fell softly around her."

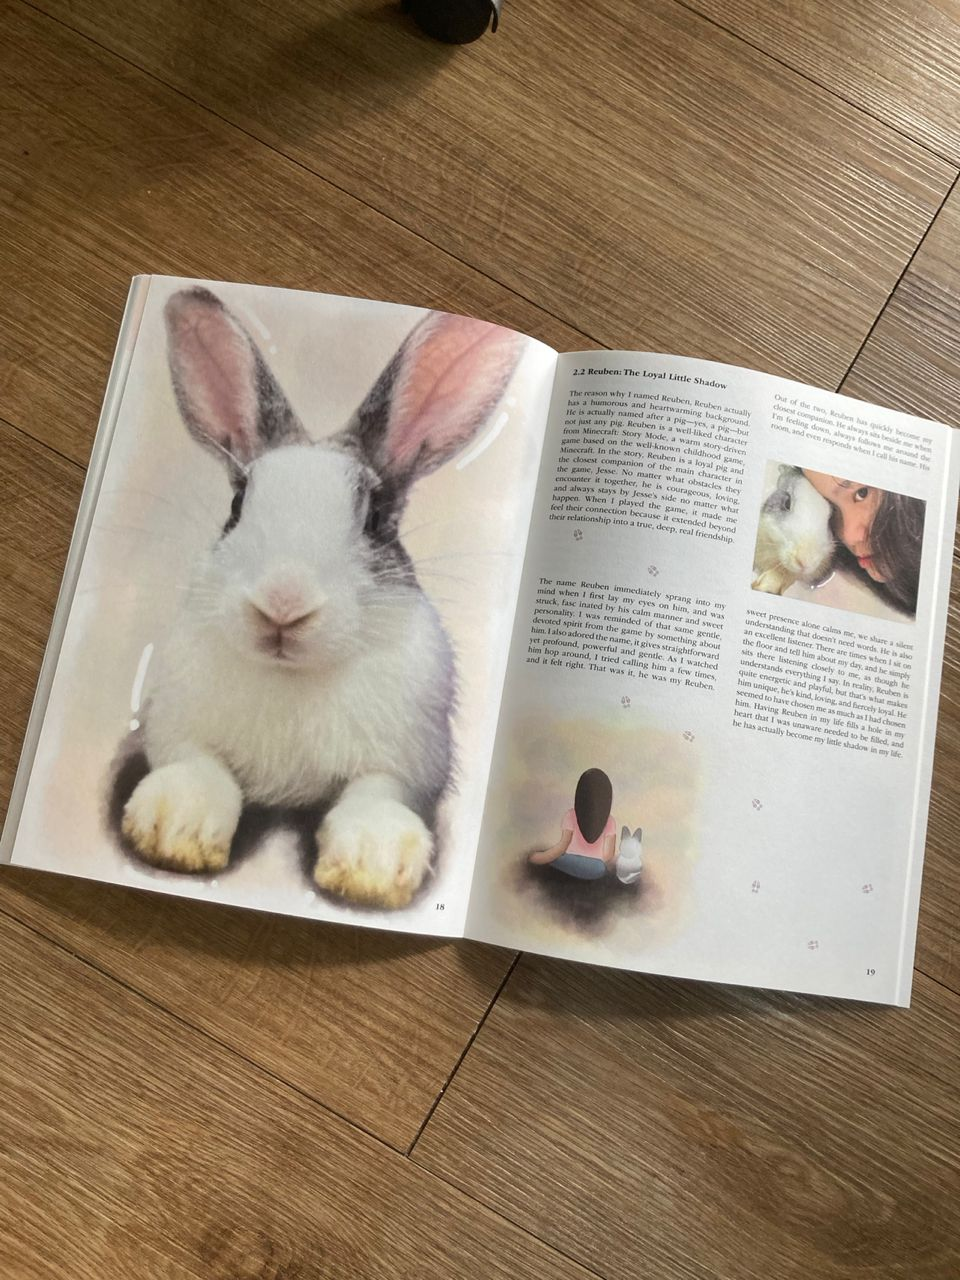
"Reuben"

"Reuben has quickly become my closet companion."

"I sit on the floor and tell him about my day, and he simply sits there listening closely to me"

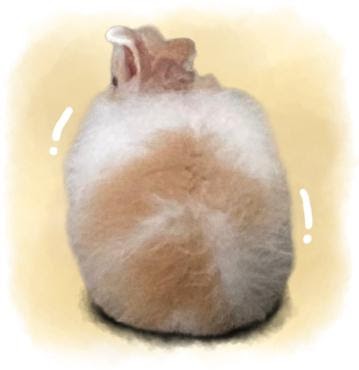
"Chanel resembles a tiny, fluffy cloud because of her long, soft fur that puffs out in all directions"
"She is always there for me"


"Three's Company: A Hop Towards Healing"

"a small, fuzzy, cuddly little koala bear"

"Koala turned out to be the most mischievous one out of the bunch!"

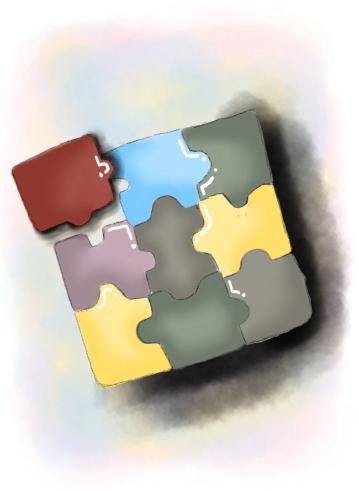
"final puzzle piece had finally fallen into place."
"the duo"
"moment that deeply touched me the most was seeing them all together"

"A Home Full of Hops and Hearts"

"My bunny family"

fig 3.8 Illustration PDF (13/6/2025)
I tend to draw my illustrations to a more children book's feeling and I want my book to give off a children book feel.
TASK 3(A): Book
This is my first draft.
fig 3.9 Three Bunnies, One Heart #1 Draft PDF Spread (18/6/2025)
After checking with Ms Vit, she said that I should improve the cover page as it's too childlike and the paw print around the pages should be dimmer and smaller.
And so... I start working on it again...
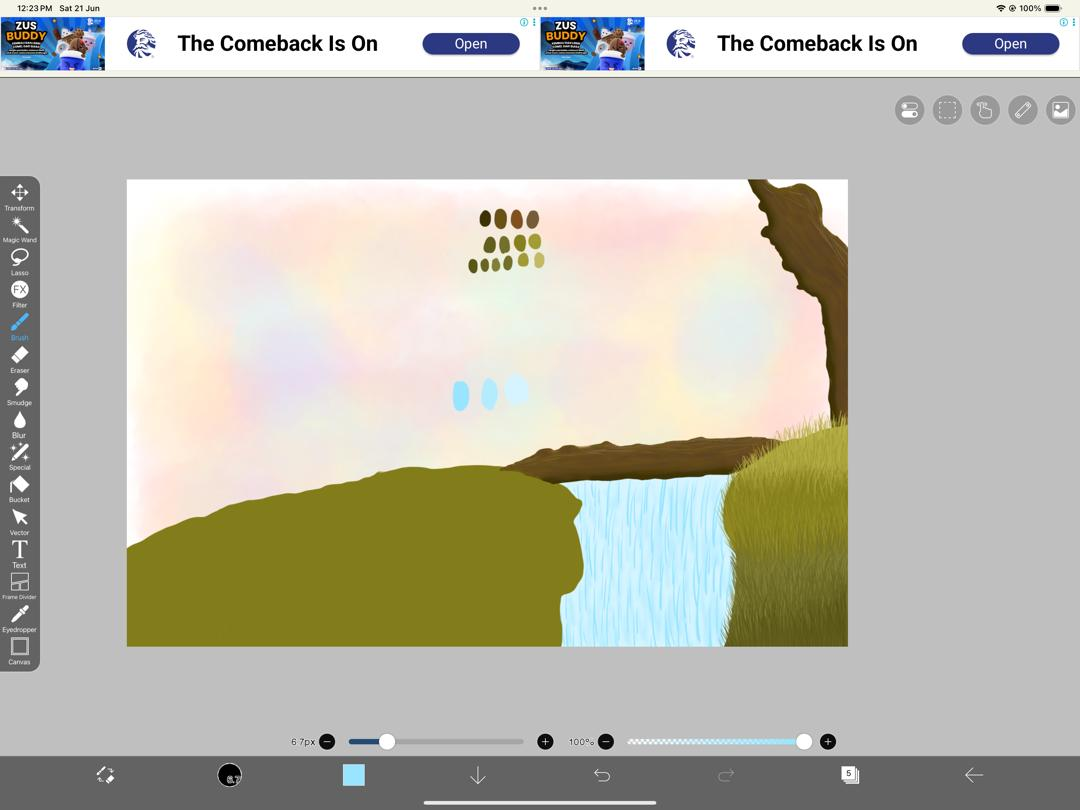
fig 3.10 Working on Book Cover (20/6/2025)


TASK 3(B): E-BOOK
Link to FlipBook.
FEEDBACK
Week 1
General Feedback: Go through the module briefing, make sure to watch all the lecture videos and write it in the blog
Specific Feedback: No Feedback Given.
Week 2
General Feedback: Complete the exercises from YouTube. Start with your 3000 words.
Specific Feedback: No Feedback Given.
Week 3
General Feedback: Checked my 3000 words and complete the exercises
Specific Feedback: 3000 words checked. Can move on
Week 4
General Feedback: Brief through again with the tasks and determine the grids for your 3000 words
Specific Feedback: Complete your layout and put in your illustrations/images
Week 5
General Feedback: Typography in a storybook is important. Complete your movements exercise today before the class end. Start doing your layout for your storybook.
Specific Feedback: Complete the movement exercise and the layout of my storybook.
Week 6
General Feedback: Make sure to package your work after that, Tiff, 300dpi in CMYK colour.
Specific Feedback: Fix the pixelated in your illustration, think some embellishment for your chapter's part, maybe a carrot? Rabbit footprint thorough the layout, play around.
Week 7
General Feedback: Adjust the kerning and make sure the whole layout throughout the book is in the flow and one theme
Specific Feedback: Continue to finish your layout.
Week 8
General Feedback: Independent Learning Week
Specific Feedback: Independent Learning Week
Week 9
General Feedback: Show me the content spread sheet next week.
Specific Feedback: Improve on the cover page, the paw illustration should be dimmer and smaller.
Week 10
General Feedback: Need to confirm the front and back cover next week, continue to work on your layout and fix what is needed to fix.
Specific Feedback: Love the colours, fix your number place and put below instead. Your text seems to be floating so fix on that.
Week 11
General Feedback: Remember to make your promotional poster and prepare for your presentation.
Specific Feedback: Proceed to print out your book.
Week 12
General Feedback: Submit your physical book today.
Specific Feedback: No Feedback Given.
Week 13
General Feedback: -
Specific Feedback: -
REFLECTION
Creating a book has been one of the most challenging yet rewarding experiences for me in this course. The process requires both technical precision and creative decision making, which pushed me beyond my comfort zone. One of the biggest challenges was adjusting the kerning of the text and the readability and consistency throughout the pages. Balancing type hierarchy, alignment, and spacing required careful attention, and it made me realize how important these small details are in creating a professional layout. Illustration, however, was the most difficult part of the journey. I initially struggled with image quality, it turns out pixelated, which meant I had to redraw them entirely. This was frustrating at times, but also taught me the importance of working with the right resolution and formats, especially for print.
Holding the final printed book in my hands was a moment of real satisfaction. Seeing all the hard work come together in a physical form made it feel truly worthwhile. The tactile quality of the paper, the way the illustrations and text sit on each page, though I know my work wasn't the best and I can work better but it all brought a sense of accomplishment that digital previews can't match.
Overall, this project taught me a lot about patience, precision, and the emotional payoff of seeing a creative vision come to life. While the process was far from easy, I'm genuinely proud of the outcome and grateful for the experience.


Comments
Post a Comment