Minor Project
24/04/2025 - 24/07/2025 | Week 01 - Week 14
Wong Jia Yi Carmen | 0357198 | Section 01 Group 03
Minor Project | Bachelor of Design (Hons) In Creative Media
TABLE OF CONTENTS
LECTURES
Week 2
W2.2 Introduction to Design Thinking
Empathy in Design
Key Quote:
“Empathy is at the heart of design. Without the understanding of what others see, feel, and experience, design is a pointless task.”
— Tim Brown, CEO, IDEOTakeaway:
Understanding user experiences, emotions, and perceptions is essential for effective design.
Design Thinking Overview
Definition:
A human-centered approach to innovation that uses the designer’s tool kit to integrate:
1. The needs of people (users)
2. The possibilities of technology3. The requirements for business success
- Origin:
Three Key Pillars of Design Innovation
Design Innovation at the Intersection
Innovation happens when solutions are desirable (user), feasible (technology), and viable (business).
Goal:
To create human-centered, innovative, and sustainable solutions.
Disciplinary Areas Supporting Design Innovation
Technology
Engineering Analysis (Statics & Dynamics)
Electronics & Mechatronics
Programming Methodology
Bioengineering
Materials Science
Thermodynamics
Chemical Engineering
Design & Interactivity
Human-Computer Interaction
Visual Thinking
Design for Sustainability
Aesthetics & Form
Manufacturing
Manufacturing Technology
Manufacturing Process
Supply Chain Management
Rapid Prototyping
Human Values
Psychology
Anthropology
Sociology
Ethnography
Need-Finding
Business
Accounting
Finance
Economic Analysis & Policy
Marketing
Operations
Information Technology
Entrepreneurship
Competition & Strategy
Organizational Behaviour
Management & Teams
Human Resources
Organizational Dynamics
Negotiation
Design Thinking Process Highlights
Human Needs:
Focus on understanding real user problems.Rapid Prototyping:
Quickly create and test ideas.Iteration:
Refine solutions based on feedback and testing.
Summary:
Design thinking is a collaborative, human-centered process that uses empathy, creativity, and interdisciplinary knowledge to solve complex problems and innovate effectively.
W2.3 Assumptions vs Empathy
Empathy
Definition:
Empathy involves deeply understanding the user’s real experiences, emotions, and needs.Purpose:
To design solutions that truly address what users are going through, rather than what we think they want or need.Key Benefit:
Leads to more effective and user-centered design outcomes.
Assumptions
Definition:
Assumptions are decisions made based on what we think or believe, rather than on actual user input or evidence.Risks:
Designing based on assumptions can lead to products or services that do not meet user needs or expectations.Key Difference:
Assumptions are internal guesses; empathy is grounded in external, user-focused understanding.
Illustrative Example
Scenario:
Assumption: “Users want more coffee machines.”
Empathy-Driven Approach:
Observe and talk to users to understand their actual experiences with coffee machines.
Identify real problems (e.g., long wait times, confusing interfaces) or desires (e.g., friendly interactions, more variety).
Summary Table: Assumption vs. Empathy
Main Takeaway:
To create successful and meaningful design solutions, always prioritize empathy—understanding real user experiences and needs—over assumptions based on personal or team beliefs.
W2.4 Empathy on Action Slides
Design Thinking Transforming Lives in Rural India
Overview:
Design Thinking is being applied to address real-world problems in rural India, demonstrating the power of a human-centered approach.Key Points:
Empathy: Understanding the unique needs and challenges of rural communities is central to effective solution design.
Innovation: Solutions are developed collaboratively, often involving local stakeholders.
Impact: Projects aim to improve quality of life, access to services, and overall well-being.
Embrace Infant Warmer
Project Description:
The Embrace Infant Warmer is a portable, low-cost solution to keep premature and low-birth-weight babies warm, especially in areas without reliable electricity.Design Thinking in Action:
User-Centered: Developed with input from healthcare workers and families in resource-limited settings.
Feasibility: Designed to be affordable, easy to use, and sustainable.
Impact: Reduces infant mortality by addressing a critical healthcare gap.
The Human Connection to Patient Care
Theme:
Design Thinking emphasizes the importance of empathy and human connection in healthcare.Key Insights:
Patient Experience: Understanding patient emotions, fears, and needs leads to more compassionate and effective care.
Healthcare Design: Solutions should focus on both clinical outcomes and the emotional well-being of patients and families.
Collaboration: Involving patients and caregivers in the design process ensures that solutions are truly responsive to their needs.
Summary Table: Design Thinking in Real-World Projects
Key Takeaways
- Empathy is at the core of successful design thinking, especially in healthcare and community development. Collaboration with end-users and stakeholders leads to more effective and sustainable solutions.
- Design thinking can transform lives by addressing real needs in innovative and practical ways
Week 3
W3.1 Why Conduct User Research Slides
Understanding User Behaviors, Needs, and Motivations
Objective:
To gain deep insights into what users do, what they need, and why they behave in certain ways.Importance:
User research is the foundation for designing effective and meaningful creative media solutions.
User Research Methods
User Interviews
Purpose:
To collect qualitative data directly from users about their experiences, preferences, and challenges.Approach:
Structured or semi-structured conversations with open-ended questions.User Observations
Purpose:
To observe users in real-world or controlled environments, capturing natural behaviors and interactions.Approach:
Field studies, shadowing, or usability testing in context.Data Analysis
Purpose:
To interpret collected data and identify patterns, themes, and actionable insights.
Types:
Quantitative Methods:
Use of surveys, analytics, and metrics to collect numerical data.Qualitative Methods:
Use of interviews, observations, and thematic analysis to understand user experiences and motivations.
Research Planning and Execution
Planning
Define Objectives:
Clearly state what you want to learn from the research.Recruitment
Select Participants:
Choose individuals who represent your target audience (personas) to ensure relevant insights.Data Collection
Methods:
Observations, interviews, and user testing.Analysis
Interpret Data:
Analyze findings to inform design decisions and project direction.
Contextual Research and Secondary Data
Sources:
The Internet
Newspapers, magazines, articles, or journals
Purpose:
To supplement primary research with existing knowledge and trends.
To understand the broader context in which users operate.
Summary Table: User Research Steps
Key Takeaway:
Effective user research combines direct engagement (interviews, observations) with data analysis and contextual research to ensure that creative media projects are grounded in real user needs and behaviors.
W3.2 Understanding User Personas
User-Centred Decision Making
Core Principle:
Always focus on real user needs, behaviours, and pain points when making design decisions.Goal:
Ensure solutions are relevant, useful, and meaningful for actual users.
Ethnographic Research
Definition:
A qualitative research method that involves observing and interacting with users in their real-life environment.Purpose:
To gain deep insights into user context, routines, and challenges.Methods:
Direct observation
Shadowing users
Taking detailed notes on user behaviour
Interviews and Observations
Interviews:
One-on-one conversations to understand user motivations, needs, and experiences.
Use open-ended questions to encourage detailed responses.
Observations:
Watch users as they interact with products or services.
Note common behaviours, frustrations, and workarounds.
Identifying Common User Patterns
Why:
Recognizing patterns in user behaviour helps in designing solutions that address widespread needs rather than isolated cases.How:
Analyze data from interviews and observations.
Look for recurring themes, actions, and pain points.
Personas
Definition:
Personas are fictional, yet realistic, representations of typical users.Purpose:
To humanize users and keep their needs at the forefront of the design process.
To guide design decisions by referencing specific user types and scenarios.
Summary Table
Key Takeaway:
Effective creative media design is rooted in understanding real users through ethnographic research, interviews, and observations. Identifying patterns and developing personas ensures that solutions are truly user-centred.
W3.3 Importance of Surveys and Research Methods
Use quantitative methods (like surveys) to measure and track user trends.
Use qualitative methods (like interviews and tests) to understand the reasons behind user actions.
Combining both approaches leads to a deeper understanding and better product decisions.
Week 4
W4.1 What are Insights in the Define Stage?
Connecting Learning to Real-World Problems
Objective:
Apply classroom concepts to solve actual user problems through observation and insight.
Turning Observations into Insights
Example 1: Feature Overload in Apps
Observation:
Users don’t use all features of an app.Insight Statement:
Users feel overwhelmed by too many features, leading to frustration and drop-off.Key Point:
Insights go beyond what is seen—they explain the “why” behind user behavior.
Example 2: Cultural Perceptions Affecting Product Use
Observation:
Villagers believed Western medicine is very strong, so they halved doses. They did the same with the Embrace Warmer, using it only halfway based on the temperature strip.Insight:
The cultural mindset of reducing doses led to underuse of the warmer, risking infant health.Design Response:
Removed the temperature strip (which was misinterpreted)
Added an “OK” indicator for correct use
Matched the product to local mental models, reducing misuse
Example 3: Infrastructure Limitations
Observation:
Many villages lacked reliable electricity, making electric infant warmers unusable.Insight:
Without alternative heating, the product would be inaccessible to much of the target population.Design Response:
Developed a hot water-heated version
Made the product adaptable to environments with limited infrastructure
Key Takeaways
Insights bridge the gap between what users do (observation) and why they do it (underlying reasons).
Design solutions should be based on real user insights, not just assumptions.
Adapting to user context (cultural beliefs, infrastructure) leads to better product adoption and usability.
Iterative refinement—continually improving the product as you learn more about real-world use.
Summary Table
Final Thoughts
Effective UX design requires understanding the real needs, beliefs, and limitations of users.
Observation → Insight → Action is the foundation for meaningful innovation.
W4.2 Data vs Findings vs Insights
Introduction
Understanding the difference between data, findings, and insights is crucial for effective UX research and impactful design decisions.
Key Concepts
A. Data
Definition: Raw, unprocessed facts collected from research (e.g., survey responses, analytics).
Example:
"60% of users prefer mobile shopping over desktop."
B. Findings
Definition: Patterns or trends identified after analyzing the data.
Example:
"Mobile shopping preference has increased by 20% in the last year."
C. Insights
Definition: Deeper understanding or interpretation that explains the 'why' behind the findings and suggests possible actions.
Example:
"Convenience and better mobile UX are making mobile shopping the preferred choice. Retailers should optimize for mobile-first experiences."
The Flow: From Data to Impact
Collect Data:
Gather quantitative or qualitative information from users.Analyze for Findings:
Look for trends, changes, or notable statistics in the data.Extract Insights:
Interpret the findings to understand user motivations, needs, or pain points.
Insights should lead to actionable recommendations.Drive Impact:
Use insights to inform design decisions and create better user experiences.
Example Table
Why Insights Matter
Insights lead to impact
They transform raw data into meaningful actions.
Help teams focus on what truly matters to users.
Drive strategic decisions for product and business success.
Key Takeaways
Always move beyond data—seek findings and actionable insights.
Insights are the bridge between research and impactful design.
Ask: What does this mean for our users? How can we improve their experience?
W4.3 What is a Problem Statement in the Define Stage?
What is a Problem Statement?
A short, focused sentence that defines the challenge from the user's perspective.
Also called the North Star — it guides the design process.
Helps teams stay focused on real user needs.
Encourages creative solutions.
Prevents jumping to assumptions too early.
Serves as a foundation for brainstorming and prototyping.
Structure of a Good Problem Statement
A well-defined problem statement answers three key questions:
Example of a Complete Problem Statement
Busy professionals who want to maintain a fitness routine
needs a way to stay active despite a busy schedule
because they struggle to find time for workouts and lose motivation when routines are disrupted.
Sample Problem Statements
Why Problem Statements Matter
Keeps the team aligned and focused on solving the right problem.
Encourages empathy by centering on the user’s perspective.
Helps avoid solution bias by focusing on the problem first.
Acts as a guiding light throughout the design process.
Tips for Writing Effective Problem Statements
Be specific about the user group.
Focus on user needs, not solutions.
Include why the need exists based on real observations.
Keep it concise and clear.
Use it as a reference point during brainstorming and prototyping.
W4.4 What Are How Might We (HMW) Questions?
Introduction: Framing the Challenge
Business Challenge Example:
"A local café is struggling to attract new customers despite having great coffee and service."Why It Matters:
Clearly defining the challenge is the first step in creative problem-solving and innovation.
The "How Might We" (HMW) Formula
Purpose:
The HMW method helps teams turn challenges into open-ended questions that inspire creative solutions.Formula Structure:
text
How might we (intended action) for (primary target user) so that (desired effect)?
How: Encourages open-ended thinking.
Might: Keeps possibilities flexible and avoids assumptions.
We: Promotes teamwork and collaboration.
Components of the Formula
Examples of HMW Questions
For the Café Challenge
How might we create a unique café experience that stands out?
How might we use social media to attract new customers?
How might we introduce loyalty programs to keep customers coming back?
For Fitness & Professionals
How might we integrate quick and effective workouts for busy professionals so that they can stay active without disrupting their schedules?
How might we use technology to support fitness habits for professionals so that they remain motivated even with unpredictable routines?
How might we design flexible workout options for people with demanding jobs so that they can exercise consistently?
Why Use HMW Questions?
Opens up a variety of solutions:
Each HMW question should allow for multiple creative answers.Launchpad for idea generation:
HMW questions become the starting point for brainstorming and prototyping.Keeps focus on user needs:
Ensures solutions are relevant and meaningful to the target audience.
Tips for Writing Good HMW Questions
Be specific about the target user.
Focus on the desired effect or outcome.
Avoid suggesting a specific solution in the question itself.
Make sure the question is broad enough to allow for many ideas, but focused enough to guide ideation.
Practice: Turn a Problem Statement into HMW Questions
Problem Statement Example:
"Busy professionals need a way to stay active despite their tight schedules because they struggle to find time for workouts and lose motivation when routines are disrupted."
HMW Questions Derived:
How might we integrate quick and effective workouts for busy professionals so that they can stay active without disrupting their schedules?
How might we use technology to support fitness habits for professionals so that they remain motivated even with unpredictable routines?
How might we design flexible workout options for people with demanding jobs so that they can exercise consistently?
Key Takeaways
The HMW method transforms challenges into creative opportunities.
Well-crafted HMW questions are essential for effective brainstorming and user-centered design.
Use the HMW formula as a "launchpad" for your project’s ideation phase.
Week 5
W5.1 What is Ideation in Design Thinking and Its Role?
Introduction
Ideation is the process of generating, developing, and communicating new ideas. It is essential for innovation in creative media, encouraging out-of-the-box thinking, collaboration, and the exploration of multiple solutions before narrowing down to the best options.
Key Ideation Techniques
Brainstorming
Purpose: To generate a large number of ideas quickly.
Steps:
Set a Clear Problem Statement: Example: “How can we make public transportation more eco-friendly?”
Establish Ground Rules:
No judgment
‘Yes, and…’ rather than ‘No, but…’
The more ideas, the better
Use Brainstorming Techniques:
Rapid Ideation: Generate many ideas in a short time (e.g., 5 minutes)
Round Robin: Each person shares an idea, and others build on it
Silent Brainstorming: Use sticky notes or digital tools like Miro
Cluster and Analyse Ideas: Group ideas, identify patterns, and shortlist the best ones.
Key Principle: Quantity over quality in the initial phase.
Mind Mapping
Purpose: To visually organize and connect ideas.
Steps:
Start with a Central Theme: Example: Sustainable Transportation
Branch Out with Main Categories: Electric Buses, Bicycle Lanes, Ride-sharing, Walking Paths
Expand with Detailed Ideas: For each category, add specifics (e.g., Electric Buses → Charging stations, Battery life, Government subsidies)
Use Colours, Symbols & Images: Helps with categorization and makes ideas more memorable
Analyse and Identify Connections: Look for patterns, gaps, and new insights by linking related ideas
Outcome: A visual representation of ideas and their relationships1.
S.C.A.M.P.E.R.
Purpose: A structured method to improve or innovate existing products, services, or processes.
Steps:
Choose an Existing Product or Idea: Example: A standard backpack
Apply Each SCAMPER Question:
Substitute: What can be replaced? (e.g., straps with ergonomic support)
Combine: What can be merged? (e.g., add a built-in power bank)
Adapt: How can it be modified for another use? (e.g., make it waterproof)
Modify: How can it be improved? (e.g., add expandable compartments)
Put to Another Use: How can it serve a different purpose? (e.g., convert to a travel bag)
Eliminate: What can be removed? (e.g., unnecessary zippers)
Reverse/Rearrange: What if the order is changed? (e.g., open from the side)
Pick the Best Modifications: Test and prototype the most practical and impactful ideas.
Crazy 8’s
Purpose: A fast-paced sketching exercise to explore multiple design concepts quickly.
Steps:
Set the Challenge: Example: “Design a new mobile app for fitness tracking.”
Fold a Sheet of Paper: Fold an A4 sheet three times to create eight sections.
Set a Timer for 8 Minutes: Each box gets 1 minute for a sketch.
Keep It Simple: Draw quick wireframes or doodles, focusing on concepts, not details.
Share and Discuss: Present sketches and discuss ideas.
Refine and Iterate: Pick the best or combine ideas for the next iteration.
Summary Table: Ideation Techniques
These techniques help creative teams generate, organise, and refine ideas efficiently, leading to innovative solutions in design and media projects.
5.2 Ideation for the User or Customer Journey Map
Definition and Purpose
A User or Customer Journey Map is a visual representation of a user’s experience with a product, service, or system. It outlines their actions, emotions, and pain points at different stages of interaction, enabling designers to understand and empathize with users’ needs and challenges.
Key Objectives
Identify Pain Points: Discover frustrations and obstacles users face.
Discover Opportunities: Find areas for innovation and improvement.
Align with Real Needs: Ensure solutions are based on actual user needs, not assumptions.
Example: Designing a Mobile Banking App
Awareness and Discovery
User Action: Notice the bank’s mobile app.
Emotions: Intrigued, curious.
Channels: Social media ads, website, online reviews, recommendations from friends, bank branch promotions.
Desires: Secure, convenient, easy-to-use app; avoid long paperwork or complex sign-up.
Pain Points: Scepticism about whether the app will be better than current banking experience.
Consideration and Comparison
User Action: Explore benefits, compare with competitors.
Emotions: Curious, sceptical, evaluative.
Channels: App store descriptions, customer reviews, YouTube comparisons, social media, word-of-mouth.
Desires: Reliable app that is easy to use, offers better services than current bank.
Pain Points: Avoid apps with hidden fees, poor customer support, or security risks.
Onboarding and First Use
User Action: Sign up, complete identity verification, explore features, make first transaction.
Emotions: Excited, but frustration possible if process is lengthy, complex, or unclear.
Channels: App interface, registration forms, ID verification, email/SMS confirmations, customer support.
Desires: Quick and easy onboarding, fast and seamless transactions.
Pain Points: Long forms, complicated verification, confusing interfaces, hidden fees, errors.
Ongoing Use and Advocacy
User Action: Continue using the app, share positive experience, leave reviews, refer friends.
Emotions: Confidence, trust, satisfaction.
Pain Points: Ongoing frustrations if issues persist.
Desires: Continued usability, reliability, and support.
Key Takeaways
Empathy: Journey maps help designers step into users’ shoes.
Visualization: Clearly show user actions, emotions, and pain points at each stage.
Improvement: Identify and address frustrations to enhance user experience.
Validation: Solutions are grounded in real user feedback and observation, not assumptions.
Table: Mobile Banking App User Journey
These notes provide a framework for understanding and applying user journey mapping in creative media and design projects.
Week 6
W6.1 What Are Design Proposal Presentations?
Introduction
A design proposal is a strategic document that defines a project’s approach, process, deliverables, timeline, and commercial terms. It serves as a tool for clear communication, ensuring alignment between the client’s needs and the designer’s vision. The proposal establishes credibility, clarifies expectations, and protects both parties contractually.
Key Components of a Design Proposal
Title Page
Project name, date, designer/company name, client name.
Introduction
Brief overview of the project.
Demonstrates understanding of the client’s needs and objectives.
Sets a professional and engaging tone.
Table of Contents
Helps clients navigate the document.
Client’s Needs and Objectives
Clearly state the client’s challenges and goals.
Use a problem statement: Who are you designing for? What do they need? Why do they need it?
Scope of Work
Details what is included (and excluded) in the project.
Prevents misunderstandings and missed expectations.
Proposed Design Solution
Outlines the creative approach and how it addresses the client’s needs.
Includes rationale for design choices and visual elements if possible.
Timeline
Realistic deadlines for each phase (research, design, feedback, revisions).
Keeps everyone on track.
Deliverables
Lists the final products (e.g., brand identity, user journey maps, design collaterals).
Qualifications and Experience
Showcases relevant work, awards, or testimonials.
Builds trust and credibility.
Cost Estimate and Payment Terms
Transparent pricing and payment structure.
Avoids surprises for both parties.
Terms and Conditions
Legal and contractual details (ownership, revisions, confidentiality).
Protects both designer and client.
Conclusion
Concise summary.
Call to action (next steps for the client).
Crafting a Stellar Design Proposal
Understand the Client’s Brand: Know their identity, values, and target audience.
Write a Clear Problem Statement: Define the challenge from the user’s perspective.
Define the Project Scope: Specify what is included and excluded.
Outline a Clear Solution: Explain how your design solves the client’s problem.
Establish a Realistic Timeline: Set achievable milestones.
Showcase a Strong Portfolio: Demonstrate your capability and experience.
Estimate Costs and Payment Terms: Be upfront about pricing.
Set Clear Terms and Conditions: Protect yourself and the client.
Summarize Concisely: End with a brief, powerful summary.
Mid-Semester and Final Presentation Components
Mid-Semester Proposal Pitch:
Contextual research
User personas
Research findings
Ideation
Branding and design direction
Final Presentation:
Brand identity
User or customer journey map
Launch and promotion strategy
Design collaterals1
Best Practices
Use Visuals: Sketches, diagrams, or mood boards help clients visualize the proposal.
Maintain Professional Tone: Clear, concise, and client-focused language.
Highlight Unique Value: Explain what sets your solution apart.
Encourage Next Steps: End with a call to action for the client345.
Summary Table: Design Proposal Structure
These notes provide a clear framework for creating and presenting a design proposal in creative media projects.
W6.2 How to Present Convincingly and Effectively?
Client-Centric Focus
Prioritize the Client: Make your presentation about the client’s needs and goals, not just your design.
Understand Their Perspective: Frame your ideas in terms of the client’s business and audience.
Setting the Tone
Confidence Matters: Present with assurance to build trust.
Warm Greeting: Start with a friendly introduction; establish a personal connection.
Eye Contact: Engage your audience to maintain attention and show sincerity.
Story Structure
Define the Problem: Clearly articulate the challenge the client faces.
Present Your Design as the Solution: Show how your work addresses their needs.
Explain Impact: Highlight the positive outcomes your design will bring.
Translate Design to Business Value
Avoid Jargon: Use simple language; explain technical terms in business terms.
Emphasize Benefits: Focus on how your design adds value to the client’s business (e.g., increased engagement, improved brand perception).
Bring Designs to Life
Use Before-and-After Visuals: Show the transformation your design delivers.
Interactive Demos: Use mockups, prototypes, or animations to demonstrate functionality and user experience.
Make It Tangible: Help clients visualize the final outcome.
Communication and Openness
Stay Solution-Oriented: Address concerns positively. Instead of rejecting feedback, explain your choices with reasoning (e.g., “We chose this colour scheme to enhance readability and match your brand’s personality.”).
Be Open: Listen to feedback and be willing to explain or adjust your design decisions.
Summarize and Guide Next Steps
Recap Key Benefits: End with a summary of how your design solves the client’s problem.
Clear Call to Action: Provide a direct next step for the client (e.g., approval, feedback, or scheduling a follow-up).
Quick Reference Table
A successful presentation is about making your client feel understood and confident in your solution. Use clear communication, engaging visuals, and always relate your design back to business value and client goals.
W6.3 How to Create Great Presentation Slides
Defining the Purpose
Clarify your message: What is the core idea you want to communicate?
Know your audience: Tailor content and tone to their interests and knowledge.
Evoke emotion: Decide what feelings your slides should inspire (excitement, trust, curiosity, etc.).
‘Less is More’ Principle
Avoid overcrowding: Limit the amount of text and images per slide.
Use white space: Let elements breathe; don’t fill every corner.
One idea per slide: Keeps focus and aids retention.
Typography
Font selection: Use 1–2 complementary font families.
Hierarchy: Bold fonts for headings; simple, legible fonts for body text.
Readability: Ensure text size is large enough for all viewers.
Colour and Mood
Limited palette: Choose a few colours that match your brand or topic.
Contrast: Use contrasting colours for emphasis and readability.
Mood setting: Colours should support the emotional tone of your message.
Visual Hierarchy
Guide the eye: Use size, weight, and placement to direct attention.
Prominence: Most important elements should stand out most.
Consistency: Align elements and maintain uniformity throughout.
Imagery
Quality matters: Use high-resolution, royalty-free images.
Vector icons/illustrations: Add style and personality.
Relevance: Every visual should support your message.
Animations and Transitions
Use sparingly: Overuse can distract from content.
Subtlety: Prefer simple fades and slides over flashy effects.
Purposeful motion: Animations should enhance, not detract.
Data Visualization
Storytelling with numbers: Use charts, graphs, and infographics to make data engaging.
Simplicity: Keep visuals uncluttered and easy to interpret.
Highlight insights: Draw attention to key takeaways, not every detail.
Beyond the Slides
Rehearse: Practice your delivery to build confidence and smooth out issues.
Seek feedback: Have others review your slides for clarity and impact.
Refine: Iterate based on feedback and your own observations.
Summary Table
Great slides are clear, focused, and visually engaging. They support your spoken message and help your audience understand and remember your key points.
INSTRUCTIONS
fig 1.0 Minor Project's MIB (24/4/2025)
Me and my 2 other coursemates decided to settle down with WAYANGMIND, and so we put our names and welcomed the rest of our groupmates.

I opened up a WhatsApp group for us to communicate even more easily.

Mr Mike opened up a Miro Board for us to join and note down our progress so he can track us and help us.
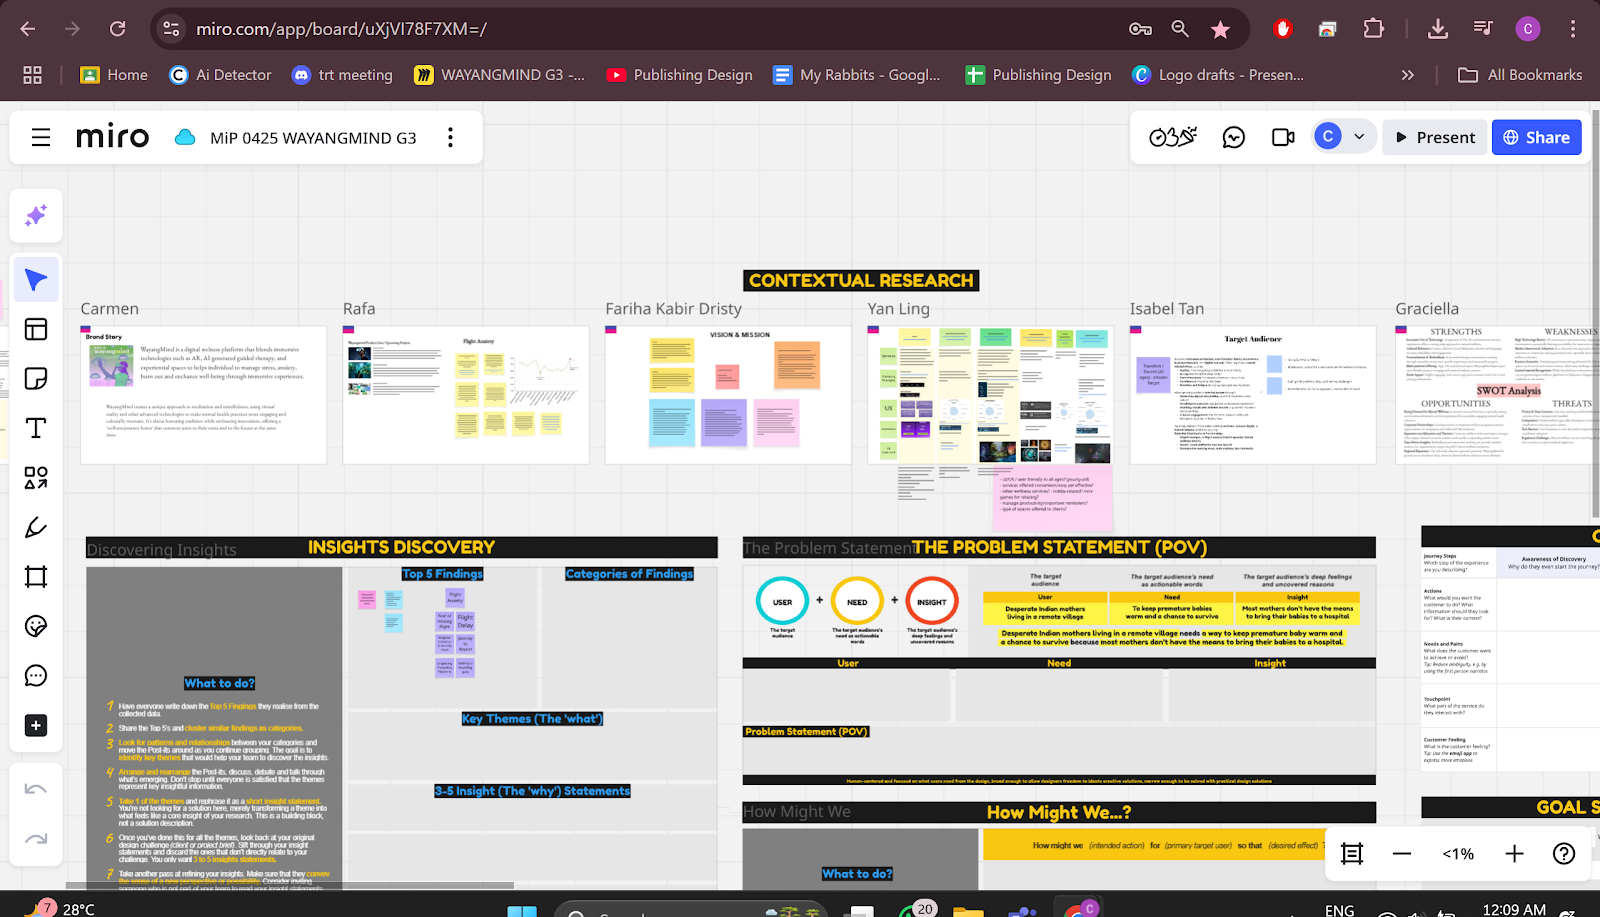
Mr Mike informed us that we need to start with contextual research and so me and my groupmates started on that.

We started to work on the Personas.

In week 5, we visited the WayangMind Studio and here are some pictures. We went to their old studio by unknowingly and they have moved and didn't update the address on their websites.


After we got our responses, we start by working on the insights in the miro board.

After that we've discovered our How Might We questions, we start working on the design proposal...
We present our slides with Mr Fariz and did some improvements...
Next step is the customer journey map.


Me, Rafa and Graciella are to do the app, so we opened up a shared Figma.


FEEDBACK
Week 1: No Feedback Given.
Week 2: Find a group and quickly settle down
Week 3: Work on persona
Week 4: No Feedback Given.
Week 5: No Feedback Given.
Week 6: No Feedback Given.
Week 7: No Feedback Given.
Week 8: Start working on the design proposal
Week 9: Revise the How Might We question again and make changes to the slides.
Week 10: No Feedback Given.
Week 11: Touchpoints are important, work on that and start working on it.
Week 12: No Feedback Given.
Week 13: Make sure everything is consistent for everything
Week 14: Check feedbacks in the Miro board to continue your work
REFLECTION
Working on the Minor Project as a group leader was both a rewarding and challenging experience. Leading a team meant I wasn’t just responsible for my own tasks, but also for making sure everyone stayed on track, met deadlines, and worked together smoothly. While I learned a lot about communication, delegation, and decision-making, I also found it tiring to constantly manage different expectations, resolve conflicts, and handle last-minute issues.
There were moments when it felt overwhelming to juggle everything, planning meetings, keeping the team organized, and making sure the project was progressing in the right direction. Not everyone worked at the same pace or had the same level of commitment, which made things even more stressful. But despite these challenges, I’m proud of how we pulled through as a team and completed the project.
Being in this leadership position helped me grow in confidence and patience. It also gave me a deeper understanding of how important teamwork, empathy, and clear communication are in any collaborative effort. Although it was exhausting at times, the experience was valuable and has definitely prepared me better for future group projects and leadership roles.


Comments
Post a Comment